Application and Removal: Peel And Stick Wall Decor

Unleash the transformative power of peel and stick wall decor! This seemingly simple act of adhesion holds the key to a stunning metamorphosis of your living space. But wielding this power requires precision and understanding. Master the art of application and removal, and your walls will sing a symphony of style.
The application and removal of peel and stick wall decor is a delicate dance between adherence and liberation. Success hinges on understanding your surface and employing the right techniques. Failure to do so may lead to unsightly wrinkles, stubborn air bubbles, or even damage to your walls. Fear not, for the secrets to flawless application and clean removal are revealed below.
Applying Peel and Stick Wall Decor to Various Surfaces
Before embarking on your decorating odyssey, prepare the battlefield. A clean, smooth surface is paramount for optimal adhesion and a flawless finish. Different surfaces require slightly different approaches, but the core principles remain the same: meticulous preparation and careful execution.
- Surface Preparation: Thoroughly clean the wall surface with a damp cloth to remove dust, dirt, and grease. Allow the surface to dry completely before proceeding. For textured walls, ensure the surface is smooth enough for proper adhesion. Consider using a primer on particularly porous surfaces.
- Peel and Position: Carefully peel back a small portion of the backing paper, exposing a few inches of the adhesive. Position the decal on the wall, ensuring it’s level and aligned to your liking. Slowly peel back the remaining backing paper while smoothing the decal onto the wall with a soft cloth or squeegee, working from the center outwards to avoid air bubbles.
- Smooth and Secure: Use a soft cloth or squeegee to firmly press the decal onto the wall, ensuring complete contact with the surface. Pay close attention to edges and corners to prevent lifting. For textured walls, use more pressure to ensure the decal adheres properly to the uneven surface.
- Painted Walls: On freshly painted walls, allow at least two to three weeks for the paint to fully cure before applying peel and stick wall decor. This ensures proper adhesion and prevents the decal from peeling off with the paint.
- Textured Walls: Textured walls present a unique challenge. While peel and stick wall decor can still be used, be prepared for potential imperfections. The texture might show through, and achieving a perfectly smooth finish might be more difficult. Use a firm but gentle hand to smooth out the decal, paying close attention to areas that sit in the valleys of the texture.
Removing Peel and Stick Wall Decor
The moment of truth arrives when it’s time to bid farewell to your wall decor. Fear not the removal process; with the right approach, it can be a clean and effortless endeavor, leaving your walls unscathed.
- Gentle Lifting: Carefully lift a corner of the decal using a fingernail or a plastic putty knife. Avoid using sharp objects that could scratch the wall.
- Slow and Steady: Slowly peel back the decal, maintaining a low angle to prevent tearing or stretching. If the decal resists, use a hairdryer on a low setting to gently warm the adhesive and loosen its grip.
- Residue Removal: If any adhesive residue remains, gently rub the area with a damp cloth or use a commercial adhesive remover. Avoid harsh chemicals that could damage the wall’s finish.
- Patience is Key: Removing peel and stick wall decor can sometimes be time-consuming, especially with larger decals or those that have been in place for an extended period. Be patient and work methodically to avoid damaging the wall.
Troubleshooting Application Problems, Peel and stick wall decor
Even the most seasoned decorators encounter occasional setbacks. Air bubbles and wrinkles are common culprits that can mar an otherwise perfect application. Knowing how to address these issues can save your project from disaster.
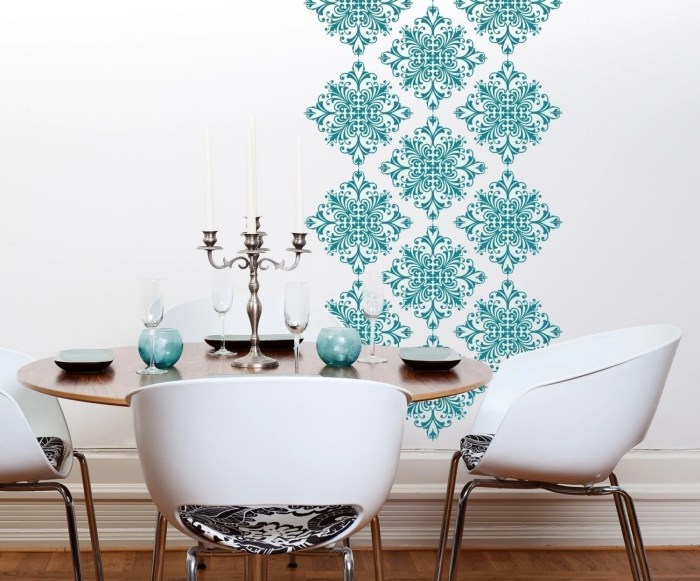
Peel and stick wall decor offers a quick and easy way to transform any space, perfect for adding a personal touch to your wedding venue. For a cohesive look, consider extending your design theme to your tables; check out these inspiring ideas for diy table decor wedding arrangements. Then, use coordinating peel and stick accents to tie the overall aesthetic together, creating a beautifully unified celebration.
- Air Bubbles: Small air bubbles can often be smoothed out using a soft cloth or squeegee. For larger bubbles, carefully pierce the bubble with a pin and gently squeeze the air out from under the decal. Then, smooth the area with a cloth.
- Wrinkles: Wrinkles can be tricky to remove completely. If the wrinkle is small, try gently stretching the decal to smooth it out. For larger wrinkles, you may need to carefully remove the affected section and reapply it. A hairdryer can be useful in loosening the adhesive to allow for repositioning.
- Uneven Adhesion: If the decal isn’t adhering properly in certain areas, make sure the surface is clean and dry. You may need to use more pressure to ensure complete contact with the wall. A hairdryer can be used to gently warm the adhesive and improve adhesion.
Creative Applications and Ideas

Peel-and-stick wall decor transcends its traditional role as mere wall covering; it’s a versatile design tool capable of transforming any space with breathtaking ease. Its adaptability allows for creative applications far beyond the expected, opening doors to innovative solutions in home décor and beyond. Let us explore the boundless potential of this transformative medium.
Unique Applications of Peel-and-Stick Decor
The inherent flexibility and ease of application of peel-and-stick wall decor allows for its use in countless unexpected ways. Think beyond the walls and consider its potential to revitalize furniture, enhance storage solutions, and add personality to previously overlooked areas.
- Transforming drab furniture: Apply peel-and-stick designs to the fronts of drawers, cabinet doors, or even the sides of a plain bookshelf to instantly upgrade their aesthetic appeal. A geometric pattern on an old dresser can create a striking modern accent. A floral design on a plain nightstand adds a touch of romantic charm.
- Creating decorative storage solutions: Line the inside of shelves or drawers with patterned peel-and-stick paper to add a pop of color and personality. This technique can also be used to create custom-designed storage boxes or containers.
- Enhancing smaller spaces: Peel-and-stick decor can be used to create visual interest in small areas like hallways or entryways. A narrow strip of vibrant patterned paper can dramatically increase the perceived spaciousness of a tight corridor.
- Adding personality to appliances: Update the look of outdated appliances, like refrigerators or microwaves, by applying peel-and-stick vinyl in coordinating patterns or colors. This offers a quick and cost-effective way to refresh kitchen aesthetics.
Visual Representation of a Room Decorated with Peel-and-Stick Wall Decor
Imagine a vibrant living room bathed in natural light. One wall features a large-scale mural created using a series of peel-and-stick panels depicting a lush tropical rainforest. The deep greens, vibrant blues, and pops of bright orange and yellow create a sense of exotic adventure. Above the fireplace, a smaller panel featuring a stylized hummingbird adds a delicate touch.
Adjacent to the rainforest mural, a textured peel-and-stick wallpaper in a subtle geometric pattern adds visual interest without overwhelming the space. The overall effect is one of vibrant energy and tranquil escape, seamlessly blending nature and modern design. The furniture, a muted grey sofa and armchairs, provides a calming contrast to the bold wall art, allowing the peel-and-stick designs to take center stage.
Peel-and-Stick Decor in Different Rooms
The choice of peel-and-stick decor should be carefully considered in relation to the room’s function and existing style. In a bedroom, calming pastel shades and delicate floral patterns create a serene atmosphere conducive to relaxation. A living room might benefit from bolder geometric patterns or nature-inspired designs to stimulate conversation and create a welcoming environment. Kitchens, often busy and high-traffic areas, could benefit from durable, easily cleanable peel-and-stick designs in bright, cheerful colors.
Bathrooms, requiring moisture-resistant materials, necessitate the use of specifically designed peel-and-stick vinyl with waterproof properties. In each room, the peel-and-stick decor should enhance and complement the existing style, creating a cohesive and visually appealing space.
Top FAQs
Can peel and stick wall decor be used on textured walls?
Yes, but the smoother the surface, the better the adhesion. Lightly textured walls generally work well, but heavily textured walls might require more careful application and may show imperfections more easily.
How long does peel and stick wall decor last?
It depends on the material and the quality of the product. High-quality vinyl decals can last for several years, while paper options might be more temporary. Proper care and cleaning will also extend their lifespan.
What happens if I get air bubbles?
Gently smooth out air bubbles with a soft cloth or credit card immediately after application. For larger bubbles, carefully lift a corner, release the air, and reapply.
Can I remove peel and stick wall decor without damaging my walls?
Generally, yes, especially if you follow the manufacturer’s instructions. However, very old or poorly applied decor might leave some residue. A little warm soapy water usually helps remove any sticky residue.


